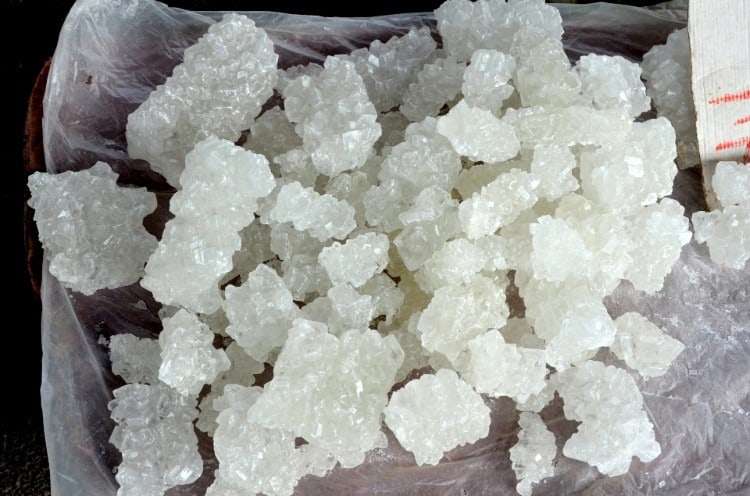
Sweet Rock Candy Science
September 10, 2019 - Emily Newton
Revolutionized is reader-supported. When you buy through links on our site, we may earn an affiliate commission. Learn more here.
Today, if you want a piece of candy, you can just walk to the store and buy some. However, why waste time and money when you can make a sweet, tasty treat with stuff you already have in your kitchen? Rock candy is easy to make, requires less than five ingredients and can be a great science experiment, too. Let’s take a closer look at the science behind creating rock candy. Then, you can try your hand at a rock candy recipe you can make at home.
The Science Behind Rock Candy
Rock candy is nothing more than sugar crystals on a stick, but how do you get from what’s in your sugar bowl to the intricate shapes we know and love? First, we need to take a closer look at the sweet stuff. This is what sugar crystals look like under a microscope:

Sugar naturally collects in these angular crystals, though you can’t see them when you’re scooping a spoonful into your morning coffee or tea. Look familiar? These are the same angles you see on rock candy when it’s done growing.
You mix water and sugar to create a solution. Water acts as a solvent, and sugar is the solute. You can only mix a certain amount of a solute into a solvent before it becomes saturated. Heating the solvent enables you to create a super-saturated solution. That super-saturation is what allows you to create rock candy out of nothing but sugar and water.
Rock Candy Recipe
Here’s an easy rock candy recipe you can try at home. With a few simple ingredients and lots of patience, you can grow your own sweets — and even add flavors and colors.
1. Collect Your Ingredients
Your first step is to collect your ingredients. The nice thing is that you only need two things to make rock candy — four if you want to add colors or flavors. All you need is:
- Water
- Granulated white sugar
- Flavors (optional)
- Food coloring (optional)
You’ll also need a saucepan or microwave-safe container, and some canning jars or other heat-safe containers. Once you’ve got all your ingredients collected, there’s one more thing you need to do before you can start creating your super-saturated solution.
2. Prep Your Stick/String
You can make rock candy on skewers or candy sticks, but if you don’t have those handy you don’t need to run to the store. All you really need is some clean, new string. Whichever you choose, you need to add seed crystals to the stick or string to give the rock candy somewhere to start growing.
Without those seed crystals, the rock candy will form along the sides of the jar, making it impossible to enjoy. For sticks or skewers, soak them in water and then roll them in sugar. If you’re using string, we recommend dipping them in your sugar/water solution and letting them dry.
3. Mix
Your next step is to mix your solvent with the solute. In this case, you’ll want roughly three parts sugar to one part water. For a small batch, do 1 cup of water to 3 cups of sugar. Use a heavy spoon to mix it together. It’ll be very thick and viscous, but you should be able to saturate all the sugar crystals with the water.
4. Add Heat
The next step is to add heat. If you’re using a microwave-safe container, heat the sugar on high for two minutes at a time, stirring the solution between each heating cycle. If you’re mixing your water and sugar in a saucepan, bring it to a boil until all the sugar is dissolved, creating a super-saturated solution.
If you’re adding flavor or color to your rock candy, now is the time to do so. You can match the colors to the flavors — like blue for raspberry or yellow for banana — or mix and match them to confuse and delight your tastebuds. Hang your string or stick in your heat-safe jars and add the boiling sugar-water solution. Now it’s time to wait.
5. Be Patient
This is arguably the hardest part of making rock candy — the waiting. If the solution was properly saturated, you’ll see crystals start to grow on your strings or sticks within a couple of days. In a week or two, as the water evaporates, you’ll see the rock candy formations that we all know and love growing in the jar.Be patient, and try not to move your solution as little as possible. Trust us — this rock candy recipe is worth the wait.
How to Make Rock Candy
Once your rock candies grow large enough, they’re ready to harvest. Pull each stick or string out of the solution and let dry. Then, all that’s left is to enjoy the fruits of your labor! Learning how to make rock candy can teach you about solutions while creating something that will delight your tastebuds — and might even prompt you to try other fun food experiments.
If you can be patient enough to wait for the sugar crystals to grow, you’ll never need to buy candy at the store ever again.
Revolutionized is reader-supported. When you buy through links on our site, we may earn an affiliate commission. Learn more here.
Author
Emily Newton
Emily Newton is a technology and industrial journalist and the Editor in Chief of Revolutionized. She manages the sites publishing schedule, SEO optimization and content strategy. Emily enjoys writing and researching articles about how technology is changing every industry. When she isn't working, Emily enjoys playing video games or curling up with a good book.


