


Revolutionized is reader-supported. When you buy through links on our site, we may earn an affiliate commision. Learn more here.
More and more people are wondering how to start 3D printing today. It’s no wonder – 3D printing is an incredible technology with endless possibilities for creativity. People are using it to make everything from functional tools to fun models. 3D printing is even the future of sustainable construction and manufacturing.
It’s easy to get started exploring 3D printing when you have a clear roadmap. What are the main 3D printing technologies and processes beginners should know about?
There are many types of 3D printing technology today. The two most common are fused deposition modeling (FDM) and stereolithography resin 3D printing (SLA). FDM is the most cost-effective and popular choice, particularly for hobbyists and beginners.
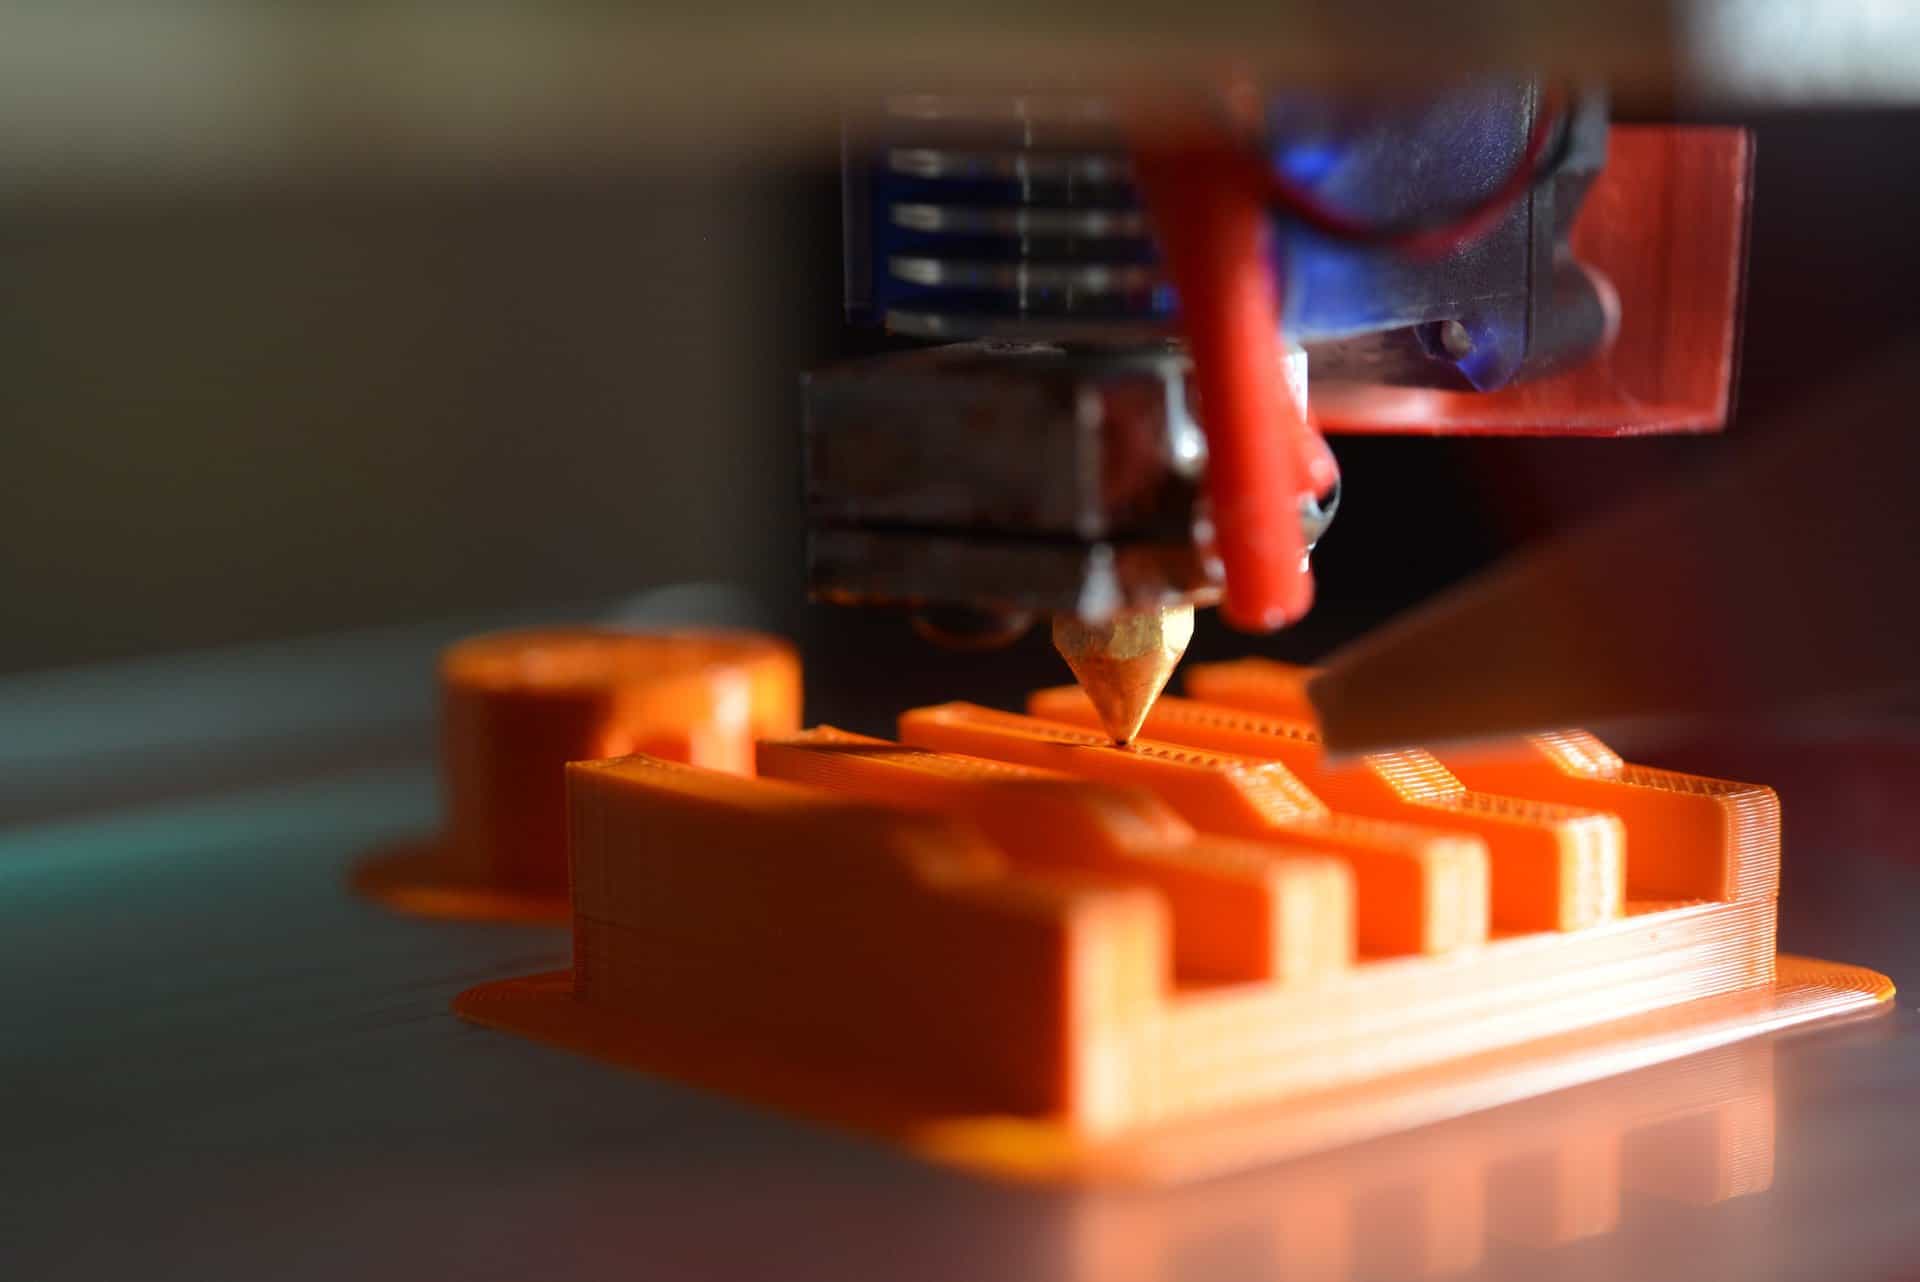
If you’ve seen a 3D printer creating models with spools of plastic filament, you’re already familiar with FDM printing. Most of the best beginner-friendly 3D printers use FDM, although there are entry-level SLA options, as well.
FDM printers melt strands of filament, which is often plastic but can be other materials, as well. The printer deposits the melted filament in layers through an extruder. As the layers are extruded on top of one another, they cool and fuse together to create a solid object.
FDM printers have several main components:
FDM is easily the most popular type of 3D printing technology today, but there are others, including SLA, DLP and SLS. FDM is often the most approachable for beginners, but it’s worth knowing a bit about the other types, too, especially SLA.
Keep in mind, if you aren’t sure what kind of printer is right for you there may be ways to try a few out. Check for a Maker Space in your area. Maker Spaces are like gyms but for creating things. Visitors pay a day fee or monthly membership to get access to all the tech and gear at the Maker Space, which almost always includes a few 3D printers.
Visiting a Maker Space is a great way to test out a couple different kinds of 3D printers before buying your own. Usually it will be a choice between FDM and SLA.
Stereolithography, or SLA, 3D printing is a very close runner-up in popularity right behind FDM. It has actually been around since the 1980s, although only in recent years has SLA become affordable for enthusiasts. It involves using a UV laser to harden liquid resin according to precise cross-sections of a model. Just like FDM, SLA 3D printing goes one tiny layer at a time.
SLA works upside down, though. SLA printers dip the build platform into the pool of resin at the bottom of the printer, where the UV laser hardens the resin in the right pattern. Then the platform and the model are lifted again, fresh resin is poured in, and the process repeats. SLA models tend to be higher quality than FDM, with greater precision and detail.
SLA printing can be more expensive than FDM, though, so it isn’t always the best place for beginners to start. However, SLA does open up a whole new world of possibilities for makers who are ready to give it a shot.
Digital light processing, or DLP, 3D printing is very similar to SLA. In fact, DLP is in many ways simply a second-generation version of SLA. Where SLA printers use a laser to trace out each layer, DLP printers essentially flash the whole layer at once using a projector beneath the pool of resin. As a result, DLP is much faster than SLA. While it will come at a higher price, DLP printers can produce some of the best quality around, making for great models.
Where SLA and DLP print by shining light on liquid, SLS prints by shining light on powder. The printer precisely melts granular plastic, like plastic sand, one layer at a time. After each layer, the printer brushes fresh powdered plastic over the build platform and the process begins again. This is a process known as powder bed fusion.
SLS is most commonly found in manufacturing and engineering since it can produce detailed, durable models for functional components. It’s not particularly affordable for enthusiasts, but SLS can create incredible builds with real durability.
Once you select and purchase your first 3D printer, you will need to go through an initial setup process to get it up and running. Every printer has its own initial setup, so carefully follow the directions that come with your printer.
A typical setup process should include calibration, squaring, leveling, pre-heating and a test run of the print head. Take special care in the calibration and leveling process. Skipping these steps can lead to misshapen or uneven prints, even if your printer is perfectly functional.
It’s also important to understand how to take care of your new 3D printer. Like any other piece of machinery or technology, 3D printers can run into maintenance issues if you’re not careful. For example, the nozzle is a common source of performance issues on FDM printers.
The nozzle can slowly accumulate residue from melted filament. Over time, this impacts the nozzle’s precision and diminishes print quality. So, it’s important to know how to clean your printer’s nozzle and how to replace it if necessary.
With FDM printers, it’s usually fine to leave unused filament loaded in your printer. However, if you have a resin printer, remove any unused resin after you finish a print. Resin can expire if left out in open air or sunlight. When you’re not printing, keep your resin in sealed containers in a cool spot away from direct sunlight.
Once you complete the initial setup for your printer, you’re ready to create your first project. There are a few ways you can go about doing this, but the process usually follows a few basic steps.
You will likely run into a few speed bumps on your first project, but don’t get discouraged. That’s simply part of learning how to start 3D printing. Give yourself plenty of time to troubleshoot and don’t be afraid to ask other printing enthusiasts for help or tips.
The first step on any 3D printing project is choosing the model you want to print. You have two options for finding a model: creating one yourself or using a model someone else shared online.
The easiest route for most beginners is using a pre-made model. There are plenty of great websites where other printing enthusiasts share their models for free. Thingiverse and Printables are among the most popular sites for sharing 3D printing files.
If you do download a pre-made model, check your printer’s specifications to make sure you get the right file type. Most FDM printers use STL files.
The second option is making your own model from scratch. This process isn’t usually ideal for beginners, but it can be a great learning experience. If you take the time to learn how to make your own 3D printing models, you’ll have complete freedom over what you print.
To do this, you’ll need to learn CAD modeling. There are several major 3D modeling programs on the market today, all available at varying prices. They can be as simple as SketchUp or professional-grade like Unreal Engine and Blender. Do some research and look for trial versions before investing in a 3D modeling program.
Blender is one of the most popular tools for creating 3D printing models today. It’s somewhat more artistic than technical CAD programs which can make it more approachable for beginners. Blender also has a large community of 3D printing users, so it’s easy to find tutorials and guides online.
One important thing to keep in mind when you’re creating your own model is supports. These are thin pieces of extra material that hold up your model while the printer is creating it. Afterward, you snap or cut the supports off. If your model has an uneven base or can’t stand upright, it may need supports to print successfully.
After you decide on the model you want to print, the next step is choosing your material. Depending on the type of printer you have, this will usually either be filament or resin. Always start by checking your printer’s specifications since not all printers can use the same materials. For instance, some FDM printers might not be compatible with metal filament.
In addition to your printer’s capabilities, the right material will depend heavily on your specific model. Most of the time some type of plastic filament or resin is fine, but you might want a specific color or finish depending on what you want to print. There are even filaments and resins with special properties like heat resistance.
Once you have your design selected and downloaded in the proper file type, it’s finally time to print. Make sure you complete the initial setup process for your printer if you haven’t already. You’ll also need to pre-heat it before starting your print. Check your printer’s guide for pre-heating directions.
You can usually upload your print file to your printer either through USB or on your local internet network. Most printers have a few ways to upload print files, so check your printer’s documentation.
In addition to pre-heating, make sure you have the right type of print material prepped. For your first project, it’s often a good idea to have some extra material around in case you need to redo the print.
Once your printer begins the printing process, all you need to do is wait. Be careful not to bump or disturb the printer since it could damage your project. You may also need to wait for the finished model to cool off before touching it. If you are using a resin printer, always wear gloves when handling your model until after you finish post-processing.
Post-processing includes a variety of treatments and adjustments you can make to your model after it’s done printing. If you are using a resin printer, skipping post-processing could be a serious safety hazard since untreated resin is usually toxic. Luckily, the resin curing process is fairly simple and doesn’t take long.
If you’re using an FDM printer, your post-processing steps will likely include some smoothing techniques to remove the choppy layer lines filament prints have. There are a few ways to do this, but it can be as simple as rubbing down the print with sandpaper. You can also paint your model or add different coatings to change the surface texture.
When you’re a beginner to 3D printing, it can be a bit intimidating at first. However, it’s easy to learn how to start 3D printing when you have a roadmap. This guide covers all of the basics to get you started, from the main types of printers to a basic printing process for your first project.
If you ever get lost or want some 3D printing inspiration, remember there are plenty of great resources online that can help you troubleshoot and get new ideas. Ultimately, 3D printing is just about having fun and getting creative with the amazing technology of additive manufacturing.
Original Publish Date 2/23/2023 – Updated 9/25/2023
Revolutionized is reader-supported. When you buy through links on our site, we may earn an affiliate commision. Learn more here.
This site uses Akismet to reduce spam. Learn how your comment data is processed.